Creating visual layouts, custom size social media posts, photo grids, and banners is a common daily task for content creators, developers, and marketers. However, most online graphic tools demand that you upload your private photos and templates to their servers. This is not only slow for large images, but it poses significant data harvesting and privacy risks.
To solve this, Safeshot has launched a fully featured, serverless tool: the Design Canvas & Collage Maker. It operates 100% offline using your local browser memory, ensuring your photos never leave your computer. In this tutorial, we will walk through how to design custom visual layouts step-by-step.
Step 1: Set Up Your Canvas Dimensions
Every design starts with the canvas size. On the left settings panel, you can choose from common pre-configured ratios:
- 1:1 Square: Perfect for Instagram posts.
- 9:16 Story: Ideal for mobile stories, reels, and vertical clips.
- 16:9 HD: The standard for YouTube thumbnails and web banners.
- Custom Resolution: Enter exact width and height pixel boundaries manually.
Step 2: Add Graphic Elements (Photos, Text, Shapes)
You can populate the layout canvas by clicking the tabs in the left sidebar:
- Photos: Click Add Image Layer to select multiple pictures from Finder/Explorer. They load locally in browser memory instantly.
- Text: Place Headings, Subheadings, or Body blocks. You can double-click any text layer inside the workspace to type directly in place. Adjust font style, size, color alignment, and background colors.
- Graphics: Drop vector shapes (Rectangles, Circles, Stars, Lines) or beautiful pre-built vector icons. You can select custom fill and outline colors.
Step 3: Arrange Layers with the Transformer Bounding Box
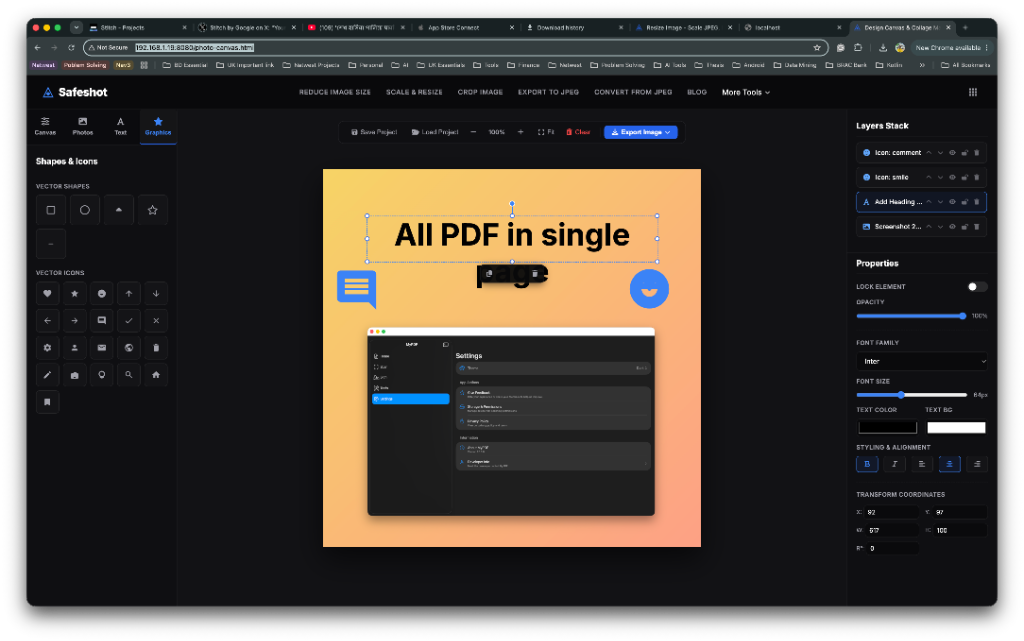
Clicking any element on the workspace shows an interactive blue selection border. You can:
- Drag the layer around to reposition it.
- Pull any of the 8 handles on the corners and edges to scale the elements.
- Grab the top handle to **rotate** elements (hold
Shiftto snap every 15°). - Use the quick actions overlay at the bottom of the bounding box to quickly delete, duplicate, or reorder the stack order.
Step 4: Control Z-Index and Visibility in Layers Stack
To arrange which layer sits on top of another, use the **Layers Stack** list on the right sidebar. It behaves like professional editor environments:
- Click Move Up or Move Down arrows to push elements forward or backward.
- Toggle the Lock icon to secure layers (e.g. background shapes) to prevent accidental mouse dragging.
- Toggle the Visibility eye icon to temporarily hide layers.
Step 5: Save/Load Project Files Offline
If you need to close your tab and continue your work later, click **Save Project** at the top. The tool exports a local .json file. Since Safeshot converts all local image layers into self-contained base64 data, loading the file back via **Load Project** will instantly restore your layers and canvas state exactly where you left off—entirely offline!
Step 6: High-Resolution Offline Export
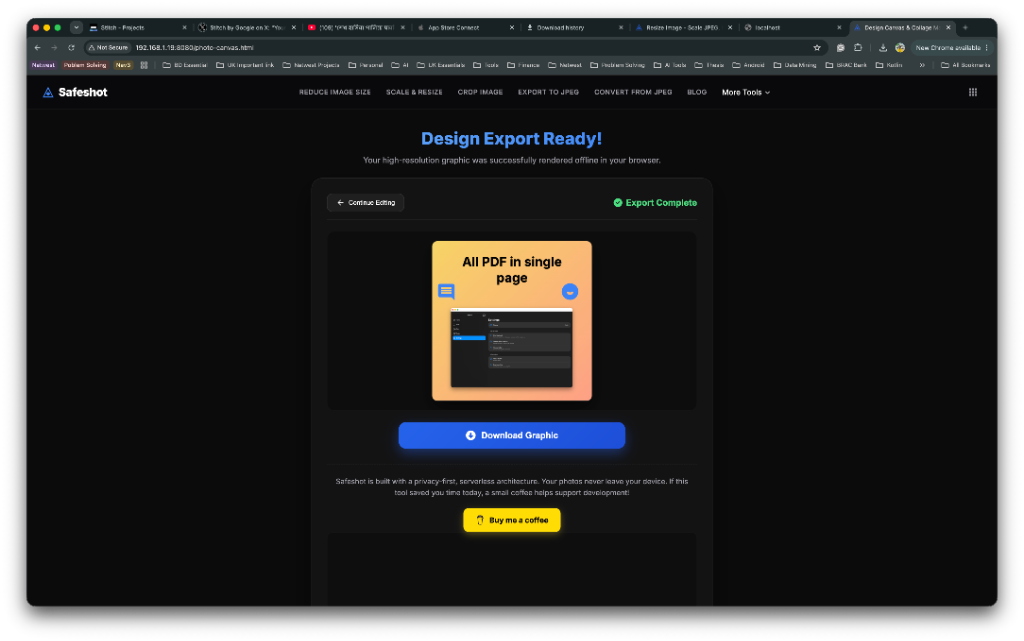
When your design is complete, click **Export Image** at the top right and choose **Export as PNG** or **Export as JPEG**. An offscreen rendering engine draws the elements at the original canvas resolution, ensuring sharp typography and graphics. The Success Page will display a preview and download link.
Ready to start designing?
Check out the live tool here: 👉 Design Canvas & Collage Maker. Make collages and banners safely without sacrificing your privacy.